Friday, December 4, 2015

Facebook Timeline Banner made using
the wonderful tube Burlesque by SoulDesigner
and the Kit Boudoir by Chili Designs
At Scraps N Company


Tuesday, November 24, 2015


CT for SoulDesigner using her tube Emilie
You can get it at Scraps N Company
Also using Matching kit Hot Vampire
by Disturbed Scraps also at Scraps N Company.


Monday, November 2, 2015


I do apologize for not making any tuts for you guys!
I took a break from CTing and Designing
as I have had a LOT going on lately.
I am back and I have Joined a NEW CT.
I am now part of Soul Designers Creative Team!
I am still waiting to hear on the rest to see if I am
able to re join them or not. But till then,
I hope you enjoy what I bring for you!!
This tut was made using PSPx7.
And knowledge of PSPx7.
Supplies needed
Tube of choice. I used one by Soul Designer.
You need a license to use her work. You can get it
and her work here at Scraps and Company.
PTU Matching kit Witchie by Designs by Joan.
Mask of choice. I used Mask 64 MB and SW by Moonbeams and Spiderwebs.
Font of choice. I used Endora.
Go ahead and open list of Things here used and go ahead and resize them
by the percentage by each item. If there is no number no need to resize.
WITCHIE_DBJ-PP (10)
Mask 64 MB and SW
WITCHIE_DBJ- ELM (104)
WITCHIE_DBJ- ELM (64)
WITCHIE_DBJ- ELM (26)
WITCHIE_DBJ- ELM (2)
WITCHIE_DBJ- ELM (10)
Tube - 38%
WITCHIE_DBJ- ELM (37) 30%
WITCHIE_DBJ- ELM (72) 20%
WITCHIE_DBJ- ELM (81) 40%
When you see ** look at tag to see placement for Elements.
Sometimes it is hard to say just how to place it.
Drop shadows added are 0.0.100.5 unless otherwise stated.
It is always good to check for overhang of shadow on edges of tag.
I have made a tag or to and not check and when I got done
I would post it and see the over hang on the sides and think MAN!! lol
Remember to save often.
Start off with New image 600 x 600.
Copy and paste WITCHIE_DBJ-PP (10) as new layer. Layers, New Mask layer.
Find the mask in the list Click ok. Merge group
Copy and paste WITCHIE_DBJ- ELM (104) as new layer. Add drop shadow.
Copy and paste WITCHIE_DBJ- ELM (64) as new layer. Add drop shadow.
Move to under frame to the left.** Duplicate move to other side erase
over hang from bottom.
Copy and paste WITCHIE_DBJ- ELM (26) as new layer. Place to left of frame.**
Add drop shadow. Duplicate and move to right just a tad.
Copy and paste WITCHIE_DBJ- ELM (2) move to bottom right of frame.** Add drop
shadow. Duplicate, Images, Flip, Mirror.
Copy and paste WITCHIE_DBJ- ELM (10) as new layer. Place on to left top to look
like it is sitting on the frame.** Add drop shadow.
Copy and paste tube as new layer. Move to right of frame.** Add drop shadow.
Copy and paste WITCHIE_DBJ- ELM (37) as new layer. Move to under tube layer at
the hand to look like she is holding it.** Add drop shadow.
Copy and paste WITCHIE_DBJ- ELM (72) as new layer and place at feet of tube.**
Add drop shadow.
Copy and paste WITCHIE_DBJ- ELM (81) as new layer kinda center.** Add drop shadow
but instead of black use white.
Add proper copyright. url and Lic if required.
Add name and your done.
This tutorial was written by Rebecca Townsley on 10/30/15.
Any similarity to any other tutorial is purely coincidental.
Any creations you make following this tutorial is yours
to do with as you please as long as there is no profit made.
This tutorial is not to be copied or passed around.
I would love to see your results!
If you would like them shown on my blog
Send them to dragonsfairy_25@hotmail.com with
Witchy Witch in the subject line
Can't wait to check them out!
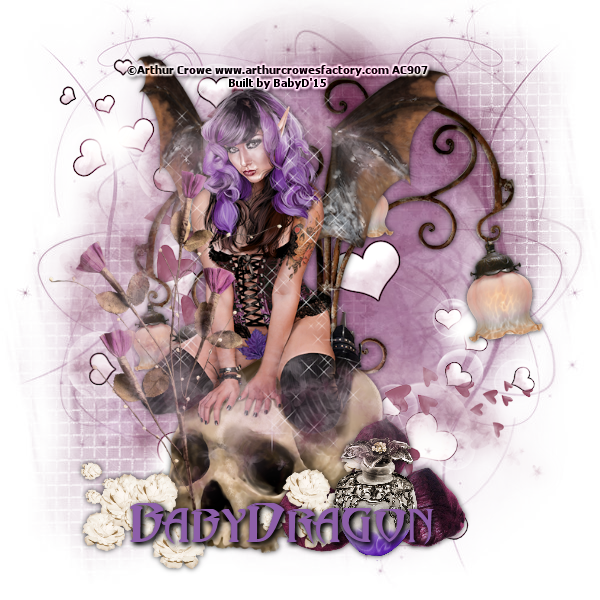
Friday, May 22, 2015


This tut was made using PSPx5.
And knowledge of PSPx5.
Supplies needed
Tube of choice. I used one by Arthur Crowe.
You need a license to use his work. You can get it
and his work here at Arthur Crowes Factory.
PTU kit Steampunk Lady by Rissa's Designs.
Mask of choice. I used MB and SW Mask 5 by Moonbeams and Spiderwebs.
Font of choice. I used Sloop for Beauty word
and Passions Conflict Rob for name.
Go ahead and open list of Things here used and go ahead and resize them
by the percentage by each item. If there is no number no need to resize.
MB and SW Mask 5
RD_SL_Paper5
RD_SL_Element26
Tube
RD_SL_Element96
RD_SL_Element92
RD_SL_Element68
RD_SL_Element46
RD_SL_Element31
RD_SL_Element64
When you see ** look at tag to see placement for Elements.
Sometimes it is hard to say just how to place it.
Drop shadows added are 0.0.100.4 unless otherwise stated.
It is always good to check for overhang of shadow on edges of tag.
I have made a tag or to and not check and when I got done
I would post it and see the over hang on the sides and think MAN!! lol
Remember to save often.
Start off with New image 600 x 600.
Copy and RD_SL_Paper5 as new layer. Layers, New Mask layer.
Find the mask in the list Click ok. Merge group
Copy and paste RD_SL_Element26 as new layer. Resize by 85%.
Add drop shadow.
Copy and paste tube as new layer. Place a part in one of the circles.
Move to below frame. Erase any part NOT in the circle.
Repeat for other two cirles and then merge the tube layers together.
Duplicate blend Hard light.
Copy and paste tube as new layer. Resize by 65% Flip Horizontal.
Move to bottom left. Add drop shadow.
Copy and paste RD_SL_Element96 as new layer. Resuze by 35%. Move to
center of the Circles.** Add drop shadow.
Copy and paste RD_SL_Element92 as new layer. Resize by 55%. Move to
bottom left of tag.** Add drop shadow.
Copy and paste RD_SL_Element46 as new layer. Resize by 55%. Move to
bottom left of tag.**
Copy and paste RD_SL_Element68 as new layer. Resize by 55%. Move to
bootom right. Place under the Stampunk element.** Add drop shadow.
Copy and paste RD_SL_Element31 as new layer. Resize by 55%. Move to
top left of tag make bottom layer.** Add drop shadow.
Copy and paste RD_SL_Element64 as new layer. Resize by 95%. Make
bottom layer. Add drop shadow.
Using Text tool and font Sloop type out Beauty then conver to rastor
layer. Drop shadow 2,2,100,8 color of white. Move to under Steampunk
words.
Add proper copyright. url and Lic if required.
Add name and your done.
This tutorial was written by Rebecca Townsley on 5/22/15.
Any similarity to any other tutorial is purely coincidental.
Any creations you make following this tutorial is yours
to do with as you please as long as there is no profit made.
This tutorial is not to be copied or passed around.
I would love to see your results!
If you would like them shown on my blog
Send them to dragonsfairy_25@hotmail.com with
Steampunk Beauty in the subject line
Can't wait to check them out!
Saturday, March 14, 2015


Monday, February 9, 2015

CT Tag and Snags using the wonderful
work of Wendy Gerber.
Kit is Wicked Princess by
Wicked Princess Scraps
Snags are below!


Saturday, February 7, 2015


NOT A 3 PIECE SET! lol
Just a tag and a Forum set.
Made using tube by Shawli
Only at The PSP Project
And kit Fantasical Friends
by Wicked Princess Scraps
Also at The PSP Project
Friday, January 30, 2015

Tag and snags made using the wonderful kit
Plum Passion by Irish Princess Designs.
For info on how to get it go to her blog


Tuesday, January 27, 2015


Using the work of Scraping Krazy Designs
Her PTU kit Pink Attitude.
Info on how to get it HERE.
Tube used is by SoulDesigner at Pics For Design.
Snags are below!


Tag and snags made using the Wonderful
tube *Shana* by Wendy Gerber
And PTU kit *Burlesque* by
Wicked Princess Designs
You can get tube at Tubes 4 Taggers
and for info on how to get the kit
visit Shani's blog HERE.
Snags are below!


Monday, January 26, 2015


Tag and Snags made using kit
Moments like This
By Tasha's Playground
For info on where to get it you can go
to her blog HERE.
Snags below!


Saturday, January 17, 2015


Thursday, January 15, 2015


Using Winter Woods by
Tasha's Playground
You can see where to get her kit
from on her blog HERE.
Snags are below.


Subscribe to:
Posts
(Atom)