Showing posts with label Tashas Playground CT. Show all posts
Showing posts with label Tashas Playground CT. Show all posts
Saturday, March 14, 2015


Monday, January 26, 2015


Tag and Snags made using kit
Moments like This
By Tasha's Playground
For info on where to get it you can go
to her blog HERE.
Snags below!


Thursday, January 15, 2015


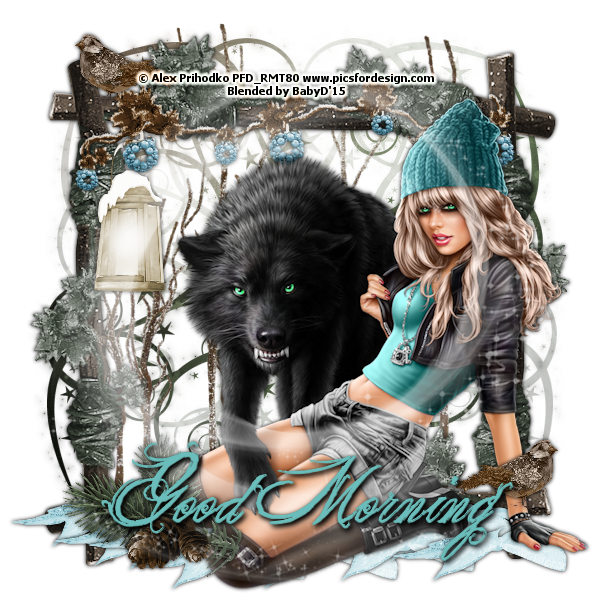
Using Winter Woods by
Tasha's Playground
You can see where to get her kit
from on her blog HERE.
Snags are below.


Friday, November 7, 2014


Made using Tasha's Playground PTU kit
Autumn Sunrise.
You can see how to get the kit at
Saturday, October 11, 2014


Both tags made using
Jennifer Janesko 97-2 CDO Inspired by Kit
made by Tasha's Playground and available at
.And the tube on bottom is a FTU tube by
Wendy G.
Was made in honor of Susan Justice's daughter
who passed away.
Tube can be found at
Monday, August 18, 2014


This tut was made using PSPx4.
And knowledge of PSPx4.
Supplies needed
Tube of choice. I used one by Zebrush.
This particular one is an Exclusive.
You need a license to use his work. You can get it
and his work here at Pics For Design.
PTU kit Birthstone Series Peridot by Tasha's Playground.
Mask of choice. I used MB and SW Mask 5 by Moonbeams and Spiderwebs.
Font of choice. I used SF Burlington Script.
Go ahead and open list of Things here used and go ahead and resize them
by the percentage by each item. If there is no number no need to resize.
MB and SW Mask 05
TP_BP_paper05 - 75%
TP_BP_frame02
tube - resize to fit
TP_BP_e23 - 80%
TP_BP_e27
TP_BP_e13
TP_BP_e30 - 70%
TP_BP_e01 - 70%
TP_BP_e10
TP_BP_e20
When you see ** look at tag to see placement for Elements.
Sometimes it is hard to say just how to place it.
Drop shadows added are 0.0.100.4 unless otherwise stated.
It is always good to check for overhang of shadow on edges of tag.
I have made a tag or to and not check and when I got done
I would post it and see the over hang on the sides and think MAN!! lol
Remember to save often.
Start off with New image 600 x 600.
Copy and paste TP_BP_paper05 as new layer. Layers, New Mask layer.
Find the mask in the list Click ok. Merge group
Copy and paste TP_BP_frame02 as new layer. Add drop shadow.
Copy and paste TP_BP_e23 as new layer. Move to right of tag.**
Add drop shadow.
Copy and paste TP_BP_e27 as new layer. Images Flip Horizontal.
Move to left of tag.** Add drop shadow.
Copy and paste TP_BP_e13 as new layer. Move to bottom of tag.**
Add drop shadow.
Copy and paste TP_BP_e30 as new layer. Move to bottom left of tag.**
Add drop shadow.
Copy and paste TP_BP_e01 as new layer. Move to top left of tag.**
Add drop shadow.
Copy and paste TP_BP_e10 as new layer. Add drop shadow.
Copy and paste TP_BP_e20 as new layer.
Copy and paste tube as new layer. Move to bottom layer. Add drop shadow.
Selections, all, float, defloat. Use eraser tools on frame, and bow layers.
Selections none, erase any overhang from bottom.
Add proper copyright. url and Lic if required.
Add name and your done.
This tutorial was written by Rebecca Townsley on 8/18/14.
Any similarity to any other tutorial is purely coincidental.
Any creations you make following this tutorial is yours
to do with as you please as long as there is no profit made.
This tutorial is not to be copied or passed around.
I would love to see your results!
If you would like them shown on my blog
Send them to dragonsfairy_25@hotmail.com with
Fresh Peridot in the subject line
Can't wait to check them out!
Wednesday, August 6, 2014


Tags and snags using Tasha's Playground
PTU kit School Hottie
Check out her blog on how to
get this wonderful kit!!
Snags Below!!


Friday, July 11, 2014


This tut was made using PSPx4.
And knowledge of PSPx4.
Supplies needed
Tube of choice. I used one by Zindy.
You need a license to use her work. You can get it
and her work here at Zindy Zone Shop.
PTU kit Release Me by Tasha's Playground.
Mask of choice MB and SW Mask 13. I used by Moonbeams and Spiderwebs.
Font of choice. I used Witched.
Go ahead and open list of Things here used and go ahead and resize them
by the percentage by each item. If there is no number no need to resize.
MB and SW Mask 13
paper8 - 75%
frame6
tube
doodle
bow2 - 95%
key
When you see ** look at tag to see placement for Elements.
Sometimes it is hard to say just how to place it.
Drop shadows added are 0.0.100.4 unless otherwise stated.
It is always good to check for overhang of shadow on edges of tag.
I have made a tag or to and not check and when I got done
I would post it and see the over hang on the sides and think MAN!! lol
Remember to save often.
This one is short and sweet.
Start off with New image 600 x 600.
Copy and paste paper8 as new layer. Layers, New Mask layer.
Find the mask in the list Click ok. Merge group
Copy and paste frame6 as new layer.
Add drop shadow.
Copy and paste tube as new layer. Move below frame layer.**
Erase any hangover from outside of frame.** Add drop shadow.
Copy and paste doodle as new layer. Move to under tube layer
and then down and right a bit.** Add drop shadow.
Copy and paste bow2 as new layer. Move to top left of frame.**
Add drop shadow.
Copy and paste key as new layer. Images, flip horizontal,
move to bottom left of tag.** Add drop shadow.
Add proper copyright. url and Lic if required.
Add name and your done.
This tutorial was written by Rebecca Townsley on 7/11/14.
Any similarity to any other tutorial is purely coincidental.
Any creations you make following this tutorial is yours
to do with as you please as long as there is no profit made.
This tutorial is not to be copied or passed around.
I would love to see your results!
If you would like them shown on my blog
Send them to dragonsfairy_25@hotmail.com with
Release Me in the subject line
Can't wait to check them out!
Saturday, June 14, 2014


This tut was made using PSPx4.
And knowledge of PSPx4.
Supplies needed
Tube of choice. I used one by Arthur Crowe.
You need a license to use his work. You can get it
and his work here at Arthur Crowes Factory.
PTU kit Forget Me Not by Tasha's Playground.
Mask of choice. I used BDD 006 made by Designz by BabyDragon.
Font of choice. I used Adrenaline : Zero.
Go ahead and open list of Things here used and go ahead and resize them
by the percentage by each item. If there is no number no need to resize.
paper10
BDD 006 Mask
frame4
car
scatter
streetlight
feather
leaf
tube - resize if needed
branch2 - 80%
bow1
swirl
When you see ** look at tag to see placement for Elements.
Sometimes it is hard to say just how to place it.
Drop shadows added are 0.0.100.4 unless otherwise stated.
It is always good to check for overhang of shadow on edges of tag.
I have made a tag or to and not check and when I got done
I would post it and see the over hang on the sides and think MAN!! lol
Remember to save often.
Start off with New image 600 x 600.
Copy and paste paper10 as new layer. Layers, New Mask layer.
Find the mask in the list Click ok. Merge group. Adjust,
Gaussian blur Radius 6. Change opacity to 50.
Copy and paste frame4 as new layer.
Add drop shadow.
Copy and paste car as new layer.
Add drop shadow.
Copy and paste scatter as new layer.
Add drop shadow.
Copy and paste streetlight as new layer. Move to
right of tag.** Add drop shadow.
Copy and paste feather as new layer. Move to bottom
right of tag.** Add drop shadow.
Copy and paste leaf as new layer. Move to just over
the feather.** Add drop shadow.
Copy and paste tube as new layer. Move to bottom of tag.**
Add drop shadow.
Copy and paste branch2 as new layer.
Move to bottom of tag.** Add drop shadow.
Copy and paste bow1 as new layer. Move to top of tag.**
Add drop shadow.
Copy and paste swirl as new layer. Move up and to the
left. Put just above mask layer.** Add drop shadow.
Add proper copyright. url and Lic if required.
Add name and your done.
This tutorial was written by Rebecca Townsley on 6/14/14.
Any similarity to any other tutorial is purely coincidental.
Any creations you make following this tutorial is yours
to do with as you please as long as there is no profit made.
This tutorial is not to be copied or passed around.
I would love to see your results!
If you would like them shown on my blog
Send them to dragonsfairy_25@hotmail.com with
Forget Me Not in the subject line
Can't wait to check them out!
Thursday, November 28, 2013

This tut was made using PSPx4
And knowledge of PSPx4.
Supplies needed
Tube of choice. I used one by Keith Garvey.
You need a license to use his work. You can get it
and his work at Garve Girls PSP Tubes.
PTU kit Winter Blush by Tasha's Playground.
Mask of Choice I used the one supplied in the kit.
Font of choice I used Santa's Sleigh.
Go ahead and open list of Things here used and go ahead and resize them
by the percentage by each item. If there is no number no need to resize.
paper7 - 75%
mask from kit
swirl
frame1
berry
branch2
berries2 fh
dry flower
branches
berries
tube - resize to fit
move to over frame
ornament1 - 50%
snowflakes3
When you see ** look at tag to see placement for Elements.
Sometimes it is hard to say just how to place it.
Drop shadows added are 0.0.75.7 unless otherwise stated.
You do not have to add drop shadow...I just do it for effects.
It is always good to check for overhang of shadow on edges of tag.
I have made a tag or to and not check and when I got done
I would post it and see the over hang on the sides and think MAN!! lol
Remember to save often.
Open new Image 600x600.
Copy and paste paper7 as new layer. Layers, new mask layer
choose the mask from the list click ok Merge group.
Copy and paste swirl as new layer.
Copy and paste frame1 as new layer. May have to move
down some.
Copy and paste berry as new layer. Move to left of frame.**
Add drop shadow.
Copy and paste branch2 as new layer. Move to left of frame.
Just to right of berry.** Add drop shadow.
Copy and paste berries2 as new layer. Images Flip Horizontal.
Move to right of frame.** Add drop shadow.
Copy and paste dry flower as new layer. Move to left of frame
just over the berries2.** Add drop shadow
Copy and paste branches as new layer. Move to bottom of frame.**
Add drop shadow.
Copy and paste berries as new layer. Place n center of branches.**
Add drop shadow.
Copy and paste tube as new layer. Place above frame layer.**
Erase any over hang you see from under the bottom of branches.
Add drop shadow.
Copy and paste ornament1 as new layer. Move to the bottom left of tag.**
Add drop shadow.
Add proper copyright. url and Lic if required
and your name. And were done.
This tutorial was written by Rebecca Townsley on 11/28/13.
Any similarity to any other tutorial is purely coincidental.
Any creations you make following this tutorial is yours
to do with as you please as long as there is no profit made.
This tutorial is not to be copied or passed around.
I would love to see your results!
If you would like them shown on my blog
Send them to dragonsfairy_25@hotmail.com with
Winter Blush in the subject line.
Can't wait to check them out!
Saturday, November 23, 2013

This tut was made using PSPx4
And knowledge of PSPx4.
Supplies needed
Tube of choice. I used one by Barbara Jensen.
You need a license to use her work. You can get it
and her work at Barbara Jensen Tubes.
PTU kit Fabulous by Tasha's Playground.
Mask of Choice I used MB and SW mask 17 from Moonbeams and Spiderwebs.
Font of choice I used P22 Corinthia.
Go ahead and open list of Things here used and go ahead and resize them
by the percentage by each item. If there is no number no need to resize.
paper12 - 75%
MB and SW Mask 17
bling scatter - 95%
swirl
brick wall 1 - 95%
frame3
tube - 85%
tattoo heart - 85%
sparkles
wordart2 - 65%
When you see ** look at tag to see placement for Elements.
Sometimes it is hard to say just how to place it.
Drop shadows added are 0.0.75.7 unless otherwise stated.
You do not have to add drop shadow...I just do it for effects.
It is always good to check for overhang of shadow on edges of tag.
I have made a tag or to and not check and when I got done
I would post it and see the over hang on the sides and think MAN!! lol
Remember to save often.
Open new Image 600x600.
Copy and paste paper12 as new layer. Layers, new mask layer
choose the mask from the list click ok Merge group.
Copy and paste bling scatter as new layer.
Add drop shadow.
Copy and paste swirl as new layer. Move to left and up a bit.**
Add drop shadow.
Copy and paste brick wall 1 as new layer.
Copy and paste frame3 as new layer.
Add drop shadow.
Copy and paste tube as new layer. Move to the right a bit.
Add drop shadow.
Copy and paste tattoo heart as new layer. Move to over the arms of tube.**
Add drop shadow.
Copy and paste sparkles as new layer. Move to top left. Duplicate,
Image flip horizontal, flip vertical, Move to bottom right. Merge
sparkle layers.**
Copy and paste wordart2 as new layer. Move to over the tattoo heart.**
Add drop shadow of 2,2,100,8.
Add proper copyright. url and Lic if required
and your name. And were done.
This tutorial was written by Rebecca Townsley on 11/23/13.
Any similarity to any other tutorial is purely coincidental.
Any creations you make following this tutorial is yours
to do with as you please as long as there is no profit made.
This tutorial is not to be copied or passed around.
I would love to see your results!
If you would like them shown on my blog
Send them to dragonsfairy_25@hotmail.com with
Bitch Please in the subject line.
Can't wait to check them out!
Wednesday, September 25, 2013

This tut was made using PSPx4
And knowledge of PSPx4.
Supplies needed
Tube of choice. I used one by Ching-Chou Kuik.
You need a license to use her work. You can get it
and her work at *Coming Soon*
PTU kit Happy Autumn by Tasha's Playground.
Mask of Choice I used Mask 44 MB and SW from
Font of choice I used Script MT Bold.
Go ahead and open list of Things here used and go ahead and resize them
by the percentage by each item. If there is no number no need to resize.
paper2
Mask 44 MB and SW
frame3
tube
leaves2
umbrella - 85% fr 45 to r
branch3 fl H
boots 50%
branch1
When you see ** look at tag to see placement for Elements.
Sometimes it is hard to say just how to place it.
Drop shadows added are 0.0.75.7 unless otherwise stated.
You do not have to add drop shadow...I just do it for effects.
It is always good to check for overhang of shadow on edges of tag.
I have made a tag or to and not check and when I got done
I would post it and see the over hang on the sides and think MAN!! lol
Remember to save often.
Open new Image 700x700.
Copy and paste paper2 as new layer. Layers, new mask layer
choose the mask from the list click ok Merge group.
Copy and paste frame3 as new layer.
Add drop shadow.
Copy and paste tube as new layer. Place behind frame and erase
any overhang. Add drop shadow.
Copy and paste leaves2 as new layer. Move to bottom of frame.**
Add drop shadow.
Copy and paste umbrella as new layer. Move to bottom right of
frame.** Image - Free roate 45 to the right. Add drop shadow.
Copy and paste branch3 as new layer. Move to top of frame.**
Add drop shadow.
Copy and paste boots as new layer. Move to bottom right of tag.**
Add drop shadow.
Copy and paste branch1 as new layer. Move to left of frame.**
Add drop shadow.
Add proper copyright. url and Lic if required
and your name. And were done.
This tutorial was written by Rebecca Townsley on 9/25/13.
Any similarity to any other tutorial is purely coincidental.
Any creations you make following this tutorial is yours
to do with as you please as long as there is no profit made.
This tutorial is not to be copied or passed around.
I would love to see your results!
If you would like them shown on my blog
Send them to dragonsfairy_25@hotmail.com with
PTU Happy Autumn in the subject line.
Can't wait to check them out!
Tuesday, August 20, 2013

This tut was made using PSPx4
And knowledge of PSPx4.
Supplies needed
Tube of choice. I used one by Elias Chatzoudis.
You need a license to use his work. You can get it
and his work at Elias Art Shop .
PTU kit Summer Haze by Tasha's Playground.
Mask of Choice I used MB and SW Mask 25 by Moonbeams and Spiderwebs.
You can get it Here.
Font of choice I used MA Sexy.
Go ahead and open list of Things here used and go ahead and resize them
by the percentage by each item. If there is no number no need to resize.
paper7 - 75%
MB and SW Mask 25
net
anchor
tube - 65% or resize to fit
splash2 - 75%
palm tree - 80%
lifesaver - 50%
poles
seagull1 - 50%
shells2 - 50%
When you see ** look at tag to see placement for Elements.
Sometimes it is hard to say just how to place it.
Drop shadows added are 0.0.75.7 unless otherwise stated.
You do not have to add drop shadow...I just do it for effects.
It is always good to check for overhang of shadow on edges of tag.
I have made a tag or to and not check and when I got done
I would post it and see the over hang on the sides and think MAN!! lol
Remember to save often.
Open new Image 600x600.
Copy and paste paper7 as new layer. Layers, new mask layer
choose the mask from the list click ok Merge group.
Copy and paste net as new layer.
Copy and paste anchor as new layer. Move to the left and down.**
Add drop shadow.
Copy and paste tube as new layer. Move her down and and just over
the anchor.** Add drop shadow.
Copy and paste splash2 as new layer. Move to to have bottom of splash
be even with bottom of mermaid.**
Copy and paste palm tree as new layer. Move to right of tag a bit.**
Add drop shadow.
Copy and paste lifesaver as new layer. Move to over palm tree to
look like it is haning on the tree.** Add drop shadow.
Copy and paste poles as new layer. Move to bottom right of tag.**
Add drop shadow.
Copy and paste seagull1 as new layer. Move to over the poles to
make it look like it is standing on them.** Add drop shadow.
Copy and paste shells2 as new layer. Place at bottom of poles.**
Add drop shadow.
Add proper copyright. url and Lic if required
and your name. And were done.
This tutorial was written by Rebecca Townsley on 8/20/13.
Any similarity to any other tutorial is purely coincidental.
Any creations you make following this tutorial is yours
to do with as you please as long as there is no profit made.
This tutorial is not to be copied or passed around.
I would love to see your results!
If you would like them shown on my blog
Send them to dragonsfairy_25@hotmail.com with
PTU Mermaid Summer in the subject line.
Can't wait to check them out!
Wednesday, July 24, 2013

This tut was made using PSPx4
And knowledge of PSPx4.
Supplies needed
Tube of choice. I used one by Zindy Nielson.
You need a license to use her work. You can get it
and her work at ZindyZone Shop.
PTU kit These Tears by Tasha's Playground.
Mask of Choice I used Mask 34 from Moonbeams and Spiderwebs.
Font of choice I used Some Weatz Swashes.
Go ahead and open list of Things here used and go ahead and resize them
by the percentage by each item. If there is no number no need to resize.
MB and SW Mask 34
paper4 - 75%
frame 1
swirl
tube
broken glass
raindrops
beads
cluster
flower1 80%
When you see ** look at tag to see placement for Elements.
Sometimes it is hard to say just how to place it.
Drop shadows added are 0.0.75.7 unless otherwise stated.
You do not have to add drop shadow...I just do it for effects.
It is always good to check for overhang of shadow on edges of tag.
I have made a tag or to and not check and when I got done
I would post it and see the over hang on the sides and think MAN!! lol
Remember to save often.
Open new Image 600x600.
Copy and paste paper4 as new layer. Layers, New mask Layer, from image.
Find mask in the list click on it then ok. Merge Group.
Copy and paste frame 1 as new layer. Add drop shadow.
Copy and paste swirl as new layer. Move to behind frame and up to the
top a bit. Add drop shadow.
Copy and paste tube as new layer. Move to right and down a bit.**
Move to behind frame. Erase any over hang.
Copy and paste broken glass as new layer. Move to behind frame.
Set opacity to 55.
Copy and paste raindrops as new layer. Move to behind the frame.
Copy and paste beads as new layer. Move to behind frame and down
to bottom of it.** Add drop shadow.
Copy and paste cluster as new layer. Move to top of frame.**
Add drop shadow.
Copy and paste flower1 as new layer. Move to bottom right
of tag.** Duplicate resize by 80% move to the leftand down
a tad.** Add drop shadow to both.
Add proper copyright. url and Lic if required
Add saying if you wish, your name, and were done.
This tutorial was written by Rebecca Townsley on 7/24/13.
Any similarity to any other tutorial is purely coincidental.
Any creations you make following this tutorial is yours
to do with as you please as long as there is no profit made.
This tutorial is not to be copied or passed around.
I would love to see your results!
If you would like them shown on my blog
Send them to dragonsfairy_25@hotmail.com with
PTU Too late to Apologize in the subject line.
Can't wait to check them out!
Subscribe to:
Posts
(Atom)